Showing posts with label JOM JAHIT. Show all posts


 "8 PINTU MURAH REZEKI" ialah:
  • Jangan Derhaka dengan Ibu Bapa.
  • Jangan Bergaduh dengan Saudara Mara.
  • “Tidak akan papa kedana orang yang pergi menunaikan haji..”
  • Sentiasa sembahyang sunat Dhuha.
  • Jangan tidur selepas solat subuh.
  • Selalu baca doa Al-Waqiah.
  • Rezeki ada dalam perkahwinan.
  • Rezeki ada pada anak “Semasa bayi itu lahir, 4 perkara ditetapkan antaranya ialah rezeki dan rezeki anak itu juga akan turun kepada ibu bapanya. 
~~~~~~~~~~~~~~~~~~~~~~~~~~~~~~~~~~~~~~~~~~~~~~~~~~~~~~~~~~~~~~~~~~~~~~~~~~~~~~~~

Hari ni mama nak share pasal BAG WAVE...dah lama mama rancang nak buat tapi masa mama terlalu padat dengan hal-hal yang lain...rancangan selalu tertangguh sehingga laa minggu lepas baru berpeluang merealisasikannya...alhamdulillah berjaya juga akhirnya :-)

Proses pertama seperti biasa laa..kena buat pola dahulu...nak setengah hari juga bermain ngan pola ni sambil melayan kerenah dua orang puteri mama :-) kalo kakak masih ingat xtvt weekend kita minggu kita tak balik kampung ni...so mama dah plan nak isi masa tu dengan segala xtvt mana yang sempat...so siap laa xtvt memotong langsir, buat dan gunting pola beg untuk hari tu....

 Selesai satu babak..kita ke babak kedua....tapi kat atas tu dah ready to sew...sebelum tu kena laa bentang kain dulu dan juga kerja-kerja menggosok....itu yang mama penat ckit but happy to do....

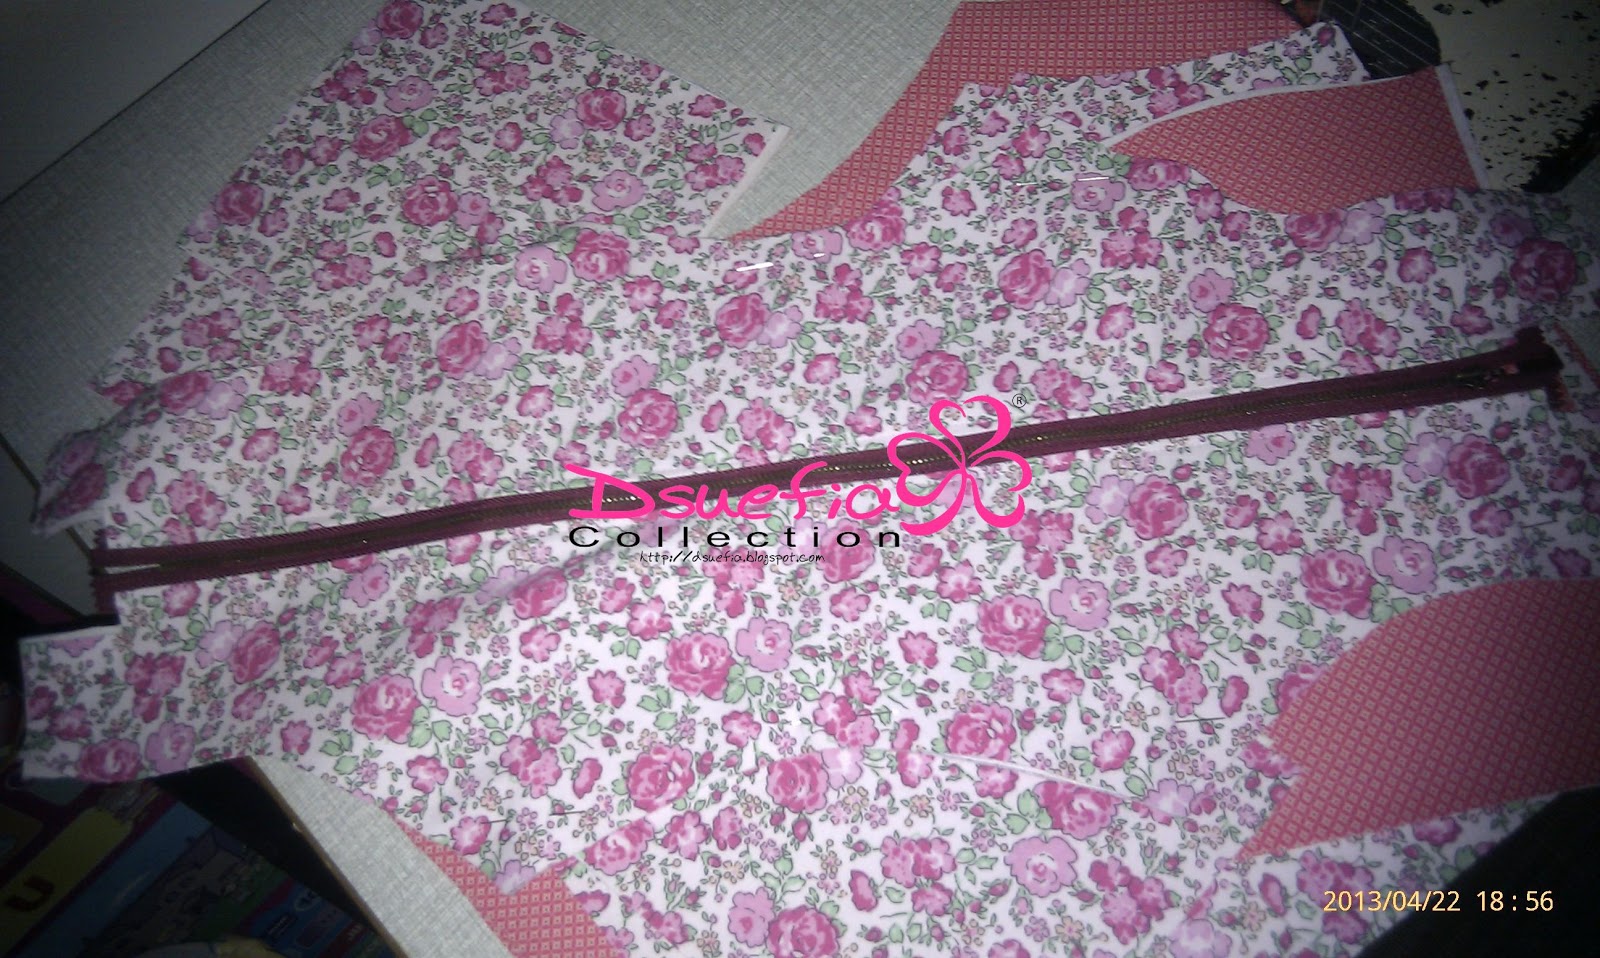
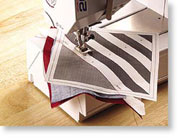
 Langkah pertama mama buat semasa menjahit beg ni ialah jahit bahagian zipnya dahulu....selesai terletak elok-elok baru memulakan langkah seterusnya....agak mudah dengan semua peralatan yang telah tersedia..cuma mengambil beberapa minit saja...

 Ini laa hasilnya...siap jahit zip stop dulu..hehe tu laa yang jadi lambatnya...kalo ikutkan sekejap saje nak siapkan beg ni...masa yang agak lama di ambil ialah masa menggosokkan kain pada interfacing...huh penat juga mama rasa...nasib kakak dan adik selalu datang menjenguk, kalo x boring juga mama sorang2 kat bilik belakang tu...

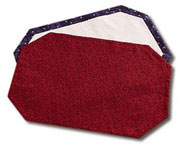
 Cantum dan cantum........itu laa hasilnya...tiap kali gambar diambil, itu laa waktu mama stop menjait..kalo x, terus jer..itulaa yang gambarnya agak tidak teratur...ini adalah hasil sebelum mama letakkan talinya...tunggu the last part untuk siapkan...ingat nak sambung esok, belek punya belek..tak leh jadi...kena siapkan jugak, kalo tidak tak lena tdo laa jawabnya asyik duk teringat...hehe

 Ini pula adalah gambaran bahagian dalamnya...dengan berpenutup zip...boleh laa letak ape saje kat dalam tu....menarik juga kan :-)

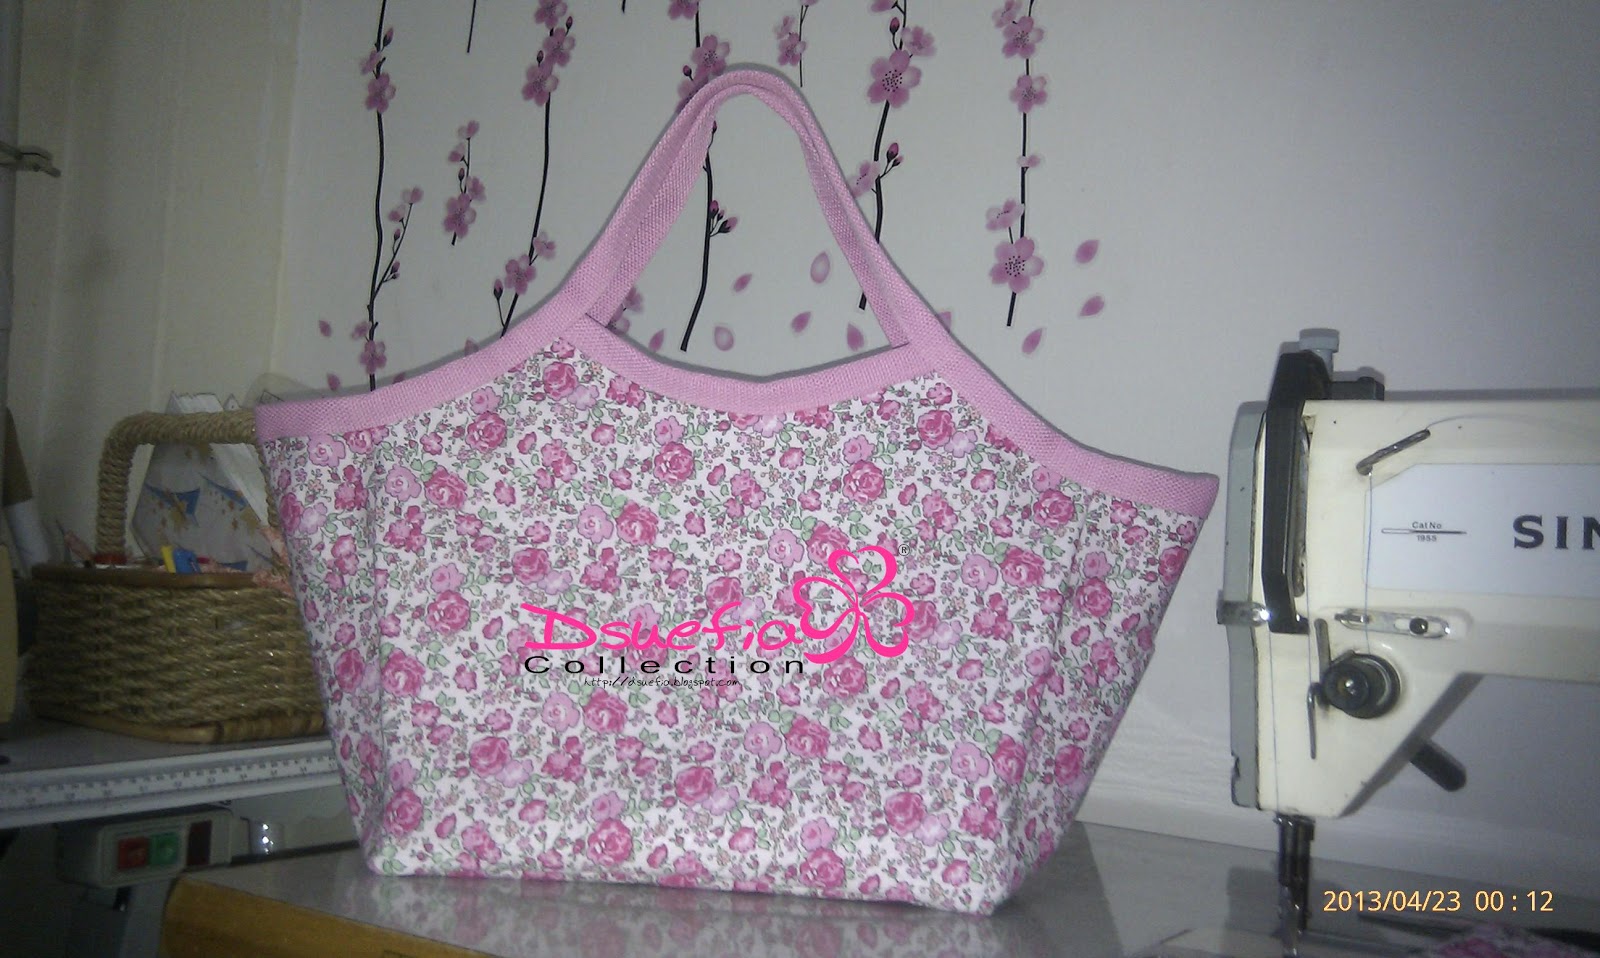
 Taraaaa........siap juga akhirnya pada malam tu..baru leh tdo lena...hehe sweet pink :-) cantik juga..masa tgk kain mama tak berkenan sangat, bila dah siap nampak cun plak...adik ngan kakak suka..babah pun komen cantik...yahoooo...bukan senang nak dapat komen positif terus dari babah tu..mesti ade jer nak komen...dua tiga kali buat baru bagi komen sedap di dengar..hehe dua tiga kali babah cakap cantik..rasa kembang kejap :-D pasni boleh buat lagi laa :-)

 Siap laa mama nak posing beg baru dia...hehe berjaya juga buat sendiri...dua tiga kali dah terlepas nak join kak zila buat beg ni, tapi selalu jer clash masa...akhirnya mama godek2 sendiri dengan patern dari kak zila ni...mama dapat kit bag wave ni masa ulangtahun ke 36 kak zila...nak jadi rezeki masa tu, buka fb jer nampak post menarik dari kak zila...apalagi mama terus ngap...mmg dah lama mengidam ni tau kak :-)

 Ini pandangan dari atas....siap dengan penutup berzip...ok kan...lepas ni sape-sape berminat leh laa calling2 mama...kalo ade masa mencelah leh laa buat...nak janji-janji tak berani...skang ni masa berpantang lagi...siap juga satu beg...mama slow-slow menjahit...

Mama tak tahan tengok mesin jahit...lama sangat dah bercuti rasanya...selalu menghitung hari...dan hari mama jahit beg ni adalah hari ke-79...adoiii rasa macam dah bertahun tak menjahit...100 ari x sampai lagi..kenapa lama sangattttt....hope x der ape-ape effect kat mama...InsyaAllah...

 Alhamdulillah....setelah berjaya menyiapkannya rasa HAPPY sangat....pasni boleh plan nak buat next projek pulak yer...sesekali beralih ke projek suka suki selain dari menjahit baju....seronok juga rasanya....sebab tu mama suka mencuba apa saje...luas sebenarnya bidang jahitan ni..bukan hanya bertumpu pada baju saja :-)

Oklah...sampai di sini dulu entry mama arini...bz sokmo mama skang, tak kira kat opis ker, kat umah...memang tak menang tangan....apepun kita kena pandai bahagi masa yer...hope anak-anak mama pun can manage ur time successfully ok :-)

Sehingga kita berjumpa lagi...salam sayang dari mama dan kata-kata mama buat puteri mama tersayang...


(-: H@PPY SeWiNG @nD Cr@fTiNG :-)


 TABLE RUNNER SET

Perfect for summer, these table accessories add a special touch to your outdoor festivities. Easy piecing techniques help you stitch the quilt blocks quickly.

Finished Sizes
Table runner is 12-1/2" x 60". Place mat is 11" x 16". Napkin is 17-1/2" square.

Materials and Supplies
45" wide cotton fabrics:
  2 yards blue star print
  2-1/2 yards white on white print
  2-1/2 yards red print
2 1/2 yards of white fusible interfacing
Sewing thread to match fabrics
Low-loft batting
20 sheets of paper
Temporary spray adhesive (optional)
Level of Difficulty
Intermediate
Instructions
Use 1/4" for all seam allowances unless otherwise stated.
Cutting:
Step 1 From white on white print fabric, cut one piece 13" x 61" for table runner backing. Cut four pieces each 10" x 15" for place mat front. Cut four pieces each 18" square for napkins.
Step 2 From red print fabric, cut four pieces each 10" x 15" for place mat backing. Cut four pieces each 18" square for napkins.
Step 3 From blue print fabric, cut two pieces each 1-1/2" x 61" and two pieces each 1-1/2" x 14" for runner binding. Cut 1-1/4" x 72" for place mat borders.
Step 4 Cut fabric pieces for each block from remaining fabrics according to paper pattern.

Table Runner:
Step 1 Make 20 copies of block pattern see piecing instructions below.
Step 2 Using paper piecing instructions, make 20 blocks with fabrics.
Step 3 For runner top, arrange blocks matching blue sections together (see photo) in two rows of ten blocks each. Stitch blocks together.
Step 4 Stack top, batting and backing with right sides out. Baste layers together.
Step 5 Using white thread, quilt as desired. Trim backing and batting to match front.
Step 6 Stitch long binding pieces to each long edge of runner top. Press raw edges of runner binding under 1/4". Turn to back of runner and hand sew edge of binding in place. Repeat with short binding pieces on short edges of runner.

Napkins:
Step 1 Stitch matching red and white fabric squares right sides together, leaving an opening for turning. Turn right side out. Press.
Step 2 Fold raw edges of opening to inside and sew closed.

Place Mats:
Step 1 Stitch 1-1/2" border strips to long edges of front piece, right sides together. Repeat on short edges. Press.
Step 2 Fold each corner of front in to form a 45 degree angle at fold. Press a crease in fabric at each fold (Illustration). Trim off each corner 1/4" from crease.
Step 3 Extending cut end past edge slightly, stitch 1-1/2" border strip to one diagonal raw edge. Press seam allowance toward border. Cut ends of diagonal border to match outer edge of horizontal and vertical borders. Repeat at each corner.
Step 4 Attach interfacing to wrong side of place mat front piece and to back pieces. Trim back piece to match shape of front. Stitch front and back right sides together, leaving an opening at center of one long edge for turning. Trim seams at corners. Turn right side out. Press. Sew opening closed.

Paper Piecing Instructions
Step 1 Each paper piecing pattern is used just once. Make enough copies to match the number of blocks in the design.
Step 2 You stitch the block together on the paper, following the printed lines; then tear the paper off and discard it.
Step 3 The number sequence on the paper pattern shows you which order to add the fabric pieces as you work.
Step 4 The paper pattern keeps your fabric from stretching as you sew and each block will be the same finished size.
Step 5 Trim the paper to about 1/2" beyond the outer edge of the block pattern. Keep the paper block whole; do not cut out the pieces of the design.
Step 6 During piecing, the fabric pieces need to be just large enough to completely cover the patch outline on the paper pattern, extending at least 1/4" beyond the outline of the patch.
Step 7 You do not have to be exact when cutting the fabric pieces, but you do want to allow enough for the seam allowances. Better to be too large than too small.
Step 8 Before adding each new fabric piece to the paper pattern, make sure it is large enough to cover the patch outline on the pattern.
Step 9 When joining the fabric pieces, set the machine to make small straight stitches (18 to 20 per inch). Begin and end the stitching 1/4" from each end of the pattern line you will be working over. Do not backstitch at the ends of the seam line.
Step 10 When pressing your work, use a dry iron and press straight down. Do not use steam. Finger pressing works well also.
Step 11 Do not tear any of the pattern away until block is complete.
Step 12 To begin each block, position fabric piece No.1 right side up on the unprinted side of the pattern in its correct location. If you cannot see the edges of the fabric through the paper, hold the layers up to a light and check to make sure the edges extend far enough past the outline. Adjust if needed and pin or glue fabric in place on wrong side of paper pattern.
Step 13 Pin fabric piece No.2 over fabric piece No.1, right sides together. With printed side of pattern up, stitch along the seam line between the two patches. Press. Turn fabric side up and press seam open.
Step 14 Fold the paper pattern back on itself along the line you just stitched. This exposes the seam allowance and allows you to trim the allowance to 1/4".
Step 15 Add each new fabric piece in the same manner as piece No. 2. When piecing is complete, trim outer edge of block 1/4" from outer seam line on pattern.

Will be my next year project...check it out..:-))

CORETAN BY DSUEFIA COLLECTION